


If you've recently started using Webflow, you might have noticed that it now supports the AVIF image format, which is great news for optimizing load times. Webflow has a tool that will convert your CMS images to AVIF, but there's a catch: it won't do the same for images inside rich text fields.
When adding images to your blog posts or other rich content, manually converting them to AVIF can make a noticeable difference in performance, but it can also be time-consuming and costly if you rely on online services that require subscriptions.
Luckily, there's a better way. By using your terminal, you can easily convert images to AVIF directly on your machine—faster and without the cost.
In this blog post, I'll walk you through a simple, effective, and entirely free method for converting your images to AVIF before uploading them to Webflow, saving you time and helping your site load even faster.
Get Your Machine Setup
If you have Node.JS and NPM installed on your machine, you can skip to the next section.
Step 1: Install Node.JS on Your Machine
If you haven’t installed Node.JS, you can do so by downloading the package and installing it here: https://nodejs.org/en
Step 2: Install NPM on Your Machine
Here are step by step instructions on how to install NPM https://docs.npmjs.com/downloading-and-installing-node-js-and-npm
Use AVIF CLI Utility
On Github, Lovell has released a helpful utility to convert images to AVIF using the CLI (Terminal). You don’t have have to upload your images to a service online, nor do you need to pay for a service. With a little Terminal Knowledge, you can handle everything locally on your machine. This speeds up conversion of images drastically, while providing you control of quality and speed output.
Here is the Github Repository: https://github.com/lovell/avif-cli
First time you run the command
The first time you run the command, you will need to install some items on your computer. On Mac, at least, it asked for access to a number of folders. I didn’t grant it access to all my folder where images were housed, just the main folders on my actual computer.
Run
npx avifThen answer yes when asked to install.
After everything is installed, you will follow the following directions:
Step 1: Navigate to Your Directory
Open your Terminal and navigate to the directory:
Here is how you get the directory path
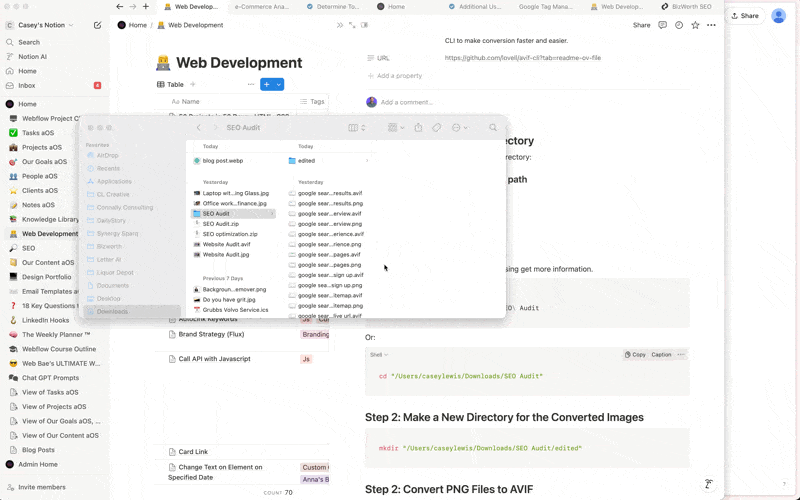
- Right click on the folder
- Get info
- Copy Path
- When you copy the path from the info panel, you will most likely get the parent folder and not the entire path: /Users/caseylewis/Downloads
- Notice, I didn’t get the entire path, which would include the SEO Audit folder.
- Make sure you add the folder name to the path once you have pasted the path into the terminal.
In the terminal, you will change the directory to the folder where the images are located. You do that using the cd command.
cd /Users/caseylewis/Downloads/SEO\ AuditOr:
cd "/Users/caseylewis/Downloads/SEO Audit"Make sure to write your directory path correct
If you folder has a space like mine SEO Audit, then you need to use a backspace in-between the words or put quotes around the entire path.
The reason I wrote the directory navigation command like this:
cd /Users/caseylewis/Downloads/SEO\ Auditis because the folder name "SEO Audit" contains a space. In the command line, spaces are typically treated as separators between different arguments. To correctly represent a folder name with a space in it, you need to escape the space so the terminal knows it's part of the same name.
Here's a breakdown:
- Backslash
\: Escapes the space character, telling the terminal that the space is part of the directory name and not an argument separator. - Alternatively, you can wrap the entire path in quotes, which also works if there are spaces:
cd "/Users/caseylewis/Downloads/SEO Audit"
Both approaches ensure that the terminal reads SEO Audit as one complete folder name rather than trying to interpret it as two separate words.
If you would like a third approach that is even more straightforward, see my post on resizing images using the Terminal.
Step 2 (Optional): Make a New Directory for the Converted Images
This step is optional, but I suggest it so your converted files are in a new folder.
If you want to add the converted images to a new folder, which I like to do, then I’d suggest you make a new directory. Making a new directory just means that you make a new folder.
Add the new folder wherever you like.
You can use the command line or you can just create a new folder like you normally would.
Just make sure you copy the path to the new folder where you want the output to go.
Here is how you would use the command line to make a new directory (folder).
Notice, I am making a new directory or folder inside of my SEO Audit folder. The new directory or folder is named edited.
mkdir "/Users/caseylewis/Downloads/SEO Audit/edited"Step 3: Convert Your Image Files to AVIF
Once you're in the correct directory, you can run the following command to convert all your images to .avif files.
In this case, I am converting all my .png files to .avif:
npx avif *.png --quality 80 --output "/Users/caseylewis/Downloads/SEO Audit/edited"This command will:
- Convert all
.pngfiles in the folder to.avif. - Set the quality to
80. - Output them to
/Users/caseylewis/Downloads/SEO Audit/editedthe new folder I created.
Options
The following options are available when converting your files.
Notice there are defaults. If you are good with the defaults, you don’t need to provide the options, you can simple run the command npx avif, if you have navigated the terminal to the directory where the image files are located.
--input Input file name(s), supports globs/wildcards [string] [default: "*.{jpg,jpeg,tif,tiff,webp,png,gif,svg}"]

--output Output directory, default is same directory as input[string] [default: ""]

--quality Quality vs file size, 1 (lowest/smallest) to 100(highest/largest)[number] [default: 50]

--effort CPU effort vs file size, 0 (fastest/largest) to 9 (slowest/smallest)[number] [default: 4]

--lossless Use lossless compression [boolean] [default: false]

--chroma-subsampling Set to '4:2:0' to use chroma subsampling [string] [choices: "4:2:0", "4:4:4"] [default: "4:4:4"]

--keep-metadata Keep all metadata (EXIF, ICC, XMP, IPTC)[boolean] [default: false]

--overwrite Allow existing output files to be overwritten [boolean] [default: false]

--append-ext Append .avif to the file name instead of replacingthe current extension (foo.jpg => foo.jpg.avif)[boolean] [default: false]

--verbose Write progress to stdout [boolean] [default: false]

-h, --help Show help [boolean]--version Show version number [boolean]Command-Line Options Breakdown
--input- Description: Specifies the input file(s) to be converted.
- Usage: You can use file names, globs, or wildcards to specify multiple files.
- Default:
"*.{jpg,jpeg,tif,tiff,webp,png,gif,svg}"(This means by default, it will try to convert all files of these types in the current directory).- If you want all files of the supported types to be converted, you simply run the command without the --input flag, and it will use the default pattern for that directory. If you want to specify only certain files or use a custom pattern, you use --input.
- Example:
--input myfile.pngor--input "*.jpg" - NOTE: If you are already in the directory containing the files, you do not need to provide the --input flag explicitly. The tool will automatically take all the files matching the default pattern (*.jpg, *.png, etc.) from the current directory.
--output- Description: Specifies the output directory where the converted
.aviffiles will be saved. - Default: Same directory as the input files.
- Example:
--output /path/to/output-folder/
- Description: Specifies the output directory where the converted
--quality- Description: Controls the quality of the output image. The value can be between 1 and 100, where 1 is the lowest quality and smallest file size, and 100 is the highest quality and largest file size.
- Default:
50(A balance between quality and compression). - Example:
--quality 80(This produces a higher quality image with less compression).
--effort- Description: Sets the level of CPU effort during compression. A value of
0is the fastest (with larger file size), while9is the slowest but provides the smallest possible file size. - Default:
4(A reasonable compromise between speed and size). - Example:
--effort 8(This will result in smaller files but may take longer to process).
- Description: Sets the level of CPU effort during compression. A value of
--lossless- Description: Uses lossless compression to preserve all image details without quality loss.
- Type: Boolean (
trueorfalse). - Default:
false(Meaning lossy compression will be used). - Example:
--lossless(This will enable lossless compression).
--chroma-subsampling- Description: Sets chroma subsampling, which affects color accuracy and compression.
4:2:0: Compresses color information (better file size, less color detail).4:4:4: No color compression (higher quality).
- Default:
"4:4:4"(No chroma subsampling for better quality). - Example:
--chroma-subsampling 4:2:0(To use more compression).
- Description: Sets chroma subsampling, which affects color accuracy and compression.
--keep-metadata- Description: Keeps all image metadata (e.g., EXIF, ICC, XMP, IPTC), such as camera settings and location data.
- Type: Boolean (
trueorfalse). - Default:
false(Metadata is stripped to save space). - Example:
--keep-metadata(Preserves metadata).
--overwrite- Description: Allows existing output files with the same name to be overwritten.
- Type: Boolean (
trueorfalse). - Default:
false(Existing files will not be overwritten). - Example:
--overwrite(Enables overwriting of existing files).
--append-ext- Description: Appends
.avifto the file name instead of replacing the current extension. For example,image.jpgwill becomeimage.jpg.avif. - Type: Boolean (
trueorfalse). - Default:
false(The original file extension is replaced). - Example:
--append-ext(Keeps the original file name with.avifappended).
- Description: Appends
--verbose- Description: Displays detailed progress information in the terminal as the files are processed.
- Type: Boolean (
trueorfalse). - Default:
false(Progress is not displayed). - Example:
-v-erbose(Shows detailed progress during conversion).
h, --help- Description: Displays help information about the commands and options available.
- Type: Boolean (
trueorfalse). - Usage:
hor--helpto display usage instructions.
--version- Description: Displays the current version of
avif-cli. - Type: Boolean (
trueorfalse). - Usage:
--versionto see which version of the tool you are using.
- Description: Displays the current version of
Example Command:
If you want to convert all .png files in the current directory to .avif format with a quality of 80, save them in an output directory, and keep metadata, you would use:
npx avif *.png --quality 80 --output ./output-folder --keep-metadataThis will:
- Convert all
.pngimages. - Set quality to 80.
- Save converted files to
./output-folder.- EX output folder:
/Users/caseylewis/Downloads/SEO Audit/edited
- EX output folder:
- Keep all metadata from the original files.
Conclusion
Converting your images to AVIF before uploading them to Webflow is a simple, effective way to improve the performance of your website.
By using the terminal, you can skip the hassle and cost of online converters, making your workflow faster and more efficient. With AVIF's superior compression and quality, your blog posts will load quicker, providing a better experience for your readers.
Give this method a try, and see how easy it is to integrate into your content creation process. Your audience—and your page speed—will thank you!

End to End Webflow Design and Development Services
From Web Design and SEO Optimization to Photography and Brand Strategy, we offer a range of services to cover all your digital marketing needs.

Webflow Web Design
We design custom Webflow websites that are unique, SEO optimized, and designed to convert.
Webflow Support
Get dedicated design and development support from a Webflow Professional Partner without the overhead of a full-time hire or the hassle of one-off project quotes.


Claim Your Design Spot Today
We dedicate our full attention and expertise to a select few projects each month, ensuring personalized service and results.